Transforming Your Living Space: A Guide to Renovation

Updated: Sep 9
Understanding the Original Space
The original space had potential but too many barriers. Before construction began, the home had good bones. The exterior walls were sound, the room had access to natural light, and the overall footprint was large enough for a better layout. The problem was how the space used that footprint.
The kitchen sat behind a partial wall, which cut it off from the dining area. A narrow doorway created a traffic bottleneck between the kitchen and living room. Anyone cooking felt separated from family or guests, and moving groceries from the entry to the kitchen meant weaving around corners.
The finishes also worked against the room.
Original Features
The original features included:
Dark, raised-panel cabinets that visually shrank the kitchen
Laminate counters with worn seams near the sink
A small tile backsplash that stopped short of the upper cabinets
Mixed flooring between the kitchen and living area
A single ceiling fixture that left shadows over prep zones
Limited outlets near modern appliances and charging stations
Several challenges shaped the renovation plan. The biggest was the wall between the kitchen and dining area. Before removing any wall, the team had to determine whether it carried structural load. Plumbing and electrical lines also ran through nearby cavities, which meant the design had to account for rerouting.
There was also a common aesthetic issue. The space had many separate finishes competing for attention. Oak cabinets, beige counters, white appliances, tan tile, and carpet created visual clutter. None of the materials were terrible on their own, but together they made the room feel dated and busy.
The renovation needed to fix three things at once: flow, function, and visual calm.
The Design Plan: Priorities for Success
The design plan focused on light, storage, and movement. The best before-and-after results start with clear priorities. In this project, the design choices came from how the household wanted to use the room every day.
The plan called for a more open kitchen, a central island, stronger task lighting, durable finishes, and a consistent floor surface from one zone to the next. The finished room needed to handle cooking, homework, casual meals, and gatherings without feeling crowded.
A simple planning diagram helped guide decisions before demolition.
Before | After |
Kitchen separated by a partial wall | Kitchen opened to dining and living zones |
Small prep area near the sink | Wider prep zones on both sides of the range and island |
Mixed flooring materials | Continuous engineered wood flooring |
One main ceiling fixture | Layered lighting with recessed lights, pendants, and under-cabinet lighting |
Limited storage in lower cabinets | Drawers, pantry storage, and island cabinets |
Visual clutter from many finishes | Warmer neutral palette with fewer competing surfaces |
The Material Palette Stayed Simple
The finished design used materials that could handle daily use without looking too heavy.
Key materials included:
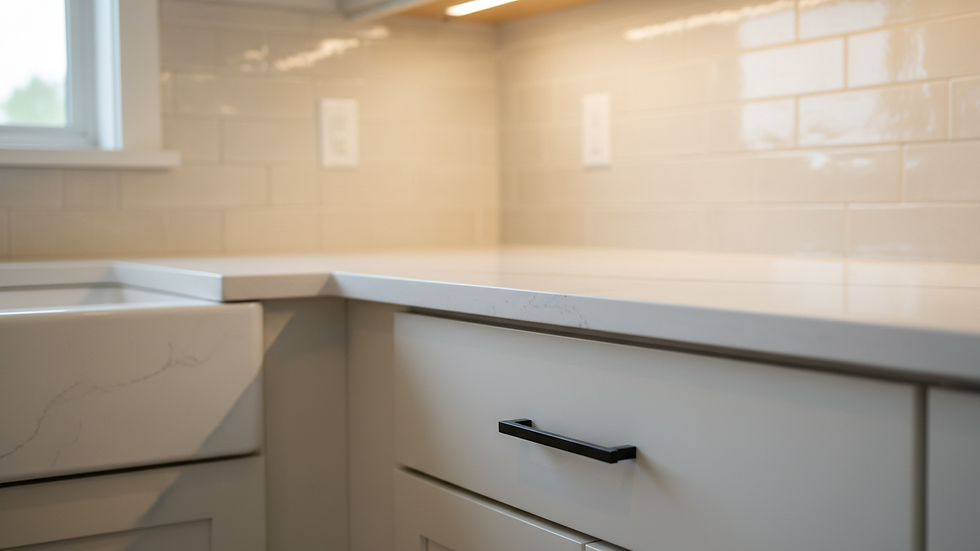
Cabinets: Painted shaker-style cabinets in a warm white finish
Countertops: Quartz with subtle veining for a clean look and low maintenance
Flooring: Engineered hardwood or durable luxury vinyl plank, depending on budget and moisture needs
Backsplash: Ceramic tile in a simple pattern to add texture without dominating the room
Lighting: Recessed LED lights, island pendants, and under-cabinet strips
Hardware: Brushed nickel or matte black pulls for contrast and easy cleaning
The design avoided trendy choices that might date quickly. Instead, it used a neutral base and added warmth through wood tones, lighting, and textiles. That approach makes future updates easier. Paint, stools, rugs, and accessories can change without replacing the core construction.

The Construction Process: Clear Stages for Success
A smooth renovation depends on sequence. Skipping steps or making decisions too late can lead to delays, change orders, and rework. While every project is different, this transformation followed a common order.
Step 1: Document the Existing Conditions
Before demolition, the team photographed the entire space. They captured walls, floor transitions, electrical outlets, plumbing locations, cabinet dimensions, ceiling fixtures, appliance clearances, and trim details.
These photos were not just for memories. They helped solve questions later, especially when walls were open and hidden systems became visible.
Homeowners can do the same with a phone. Take wide shots, close-ups, and photos inside cabinets. Label images by room if possible.
Step 2: Confirm Structure and Utilities
The partial wall could not come down until its role was clear. A contractor or structural professional inspected the framing direction, attic or basement conditions, and load paths.
If a wall is load-bearing, it may still be removable, but it will likely need a beam, posts, footings, or other structural changes. That affects cost, schedule, and design. Electrical lines, HVAC runs, and plumbing also need safe rerouting.
This stage is where many projects become more realistic. A beautiful concept must work with the structure of the house.
Step 3: Demolish Carefully
Demolition removed the old cabinets, countertops, flooring, backsplash, partial wall, and dated light fixtures. The goal was not to smash everything in sight. Good demolition is controlled.
The team protected nearby rooms with plastic sheeting, covered pathways, and set up debris removal. They turned off utilities where needed and separated reusable or recyclable materials when possible.
Once the walls and floors opened up, the team could inspect subfloor conditions and framing. This is a key moment in any renovation because hidden issues often appear here. Water stains, uneven subfloors, outdated wiring, or poorly patched framing should be addressed before new finishes go in.

Step 4: Frame the New Openings and Rough in Systems
With demolition complete, the next stage created the new layout. The team framed the widened opening between the kitchen and dining area, adjusted ceiling areas where needed, and prepared locations for the island, appliances, and lighting.
Rough-in work followed.
Electrical Rough-in Included:
Dedicated circuits for appliances
New outlets along counters and the island
Switch locations near room entries
Wiring for recessed lights and pendants
Under-cabinet lighting connections
Plumbing Rough-in Included:
Plumbing rough-in included sink and dishwasher adjustments. If the island included a sink, plumbing would become more involved because supply and drain lines would need to reach the new location.
HVAC also mattered. Opening the floor plan can change airflow. Supply vents and returns may need adjustment so one area does not become too warm or too cold.
Step 5: Repair Walls, Ceilings, and Floors
After inspections and rough-ins, the space started to look like a room again. Drywall patches closed the open framing. Seams were taped, sanded, and finished. Subfloor repairs created a flat base for the new flooring.
This stage can feel slow because much of the work is preparation. It is also one of the most important parts. Cabinets will not sit correctly on uneven floors. Tile will not look clean over wavy walls. Paint will show poor drywall finishing when light hits it.
A strong finish starts underneath.
Step 6: Install Flooring and Cabinets
The project used a continuous floor surface to connect the kitchen, dining, and living zones. This single choice made the home feel larger because the eye no longer stopped at old flooring transitions.
Cabinets came next. The layout included deep drawers for pots and pans, a pantry cabinet for dry goods, and an island with storage on the kitchen side. Drawers often work better than standard lower cabinets because items do not get lost in the back.
The island became the anchor of the new space. It created prep room, casual seating, and a soft boundary between cooking and living areas without closing anything off.
Step 7: Add Counters, Tile, Paint, and Trim
Once cabinets were secure, the countertop template could happen. Quartz counters were cut to fit the exact cabinet layout, sink opening, and appliance clearances.
Tile followed after countertop installation. A simple ceramic backsplash added texture and protected the wall from splashes. Paint tied the room together. Soft white walls kept the space bright, while trim details helped the new work match the rest of the home.
Small details mattered here. Caulk lines, outlet cover alignment, grout color, and cabinet hardware placement all shaped the final look.
Step 8: Finish Lighting, Appliances, and Final Adjustments
The final stage brought the room to life. Recessed lights brightened the full space. Pendants over the island added focus. Under-cabinet lighting made food prep easier and added a warm glow at night.
Appliances were installed, doors and drawers were adjusted, and hardware was tightened. A final walkthrough checked paint touch-ups, cabinet alignment, grout joints, outlet function, and appliance operation.
This is where the before-and-after construction transformation became clear. The same footprint now worked harder, looked calmer, and felt more welcoming.
The Finished Space: A New Way to Live
The renovation improved the room in ways that photos can show and in ways they cannot.
The most visible change was light. Removing the partial wall allowed daylight to travel farther through the space. The layered lighting plan reduced shadows and made each zone more useful at different times of day.
The second major change was movement. The old layout forced traffic through narrow points. The new plan created several clear paths around the island and between rooms. More than one person could cook, clean, or pass through without feeling in the way.
Storage also improved. Instead of relying on deep, hard-to-reach cabinets, the new kitchen used drawers, pantry storage, and island cabinets. That made everyday items easier to find and put away.
Aesthetically, the finished room felt more settled. The continuous flooring, simple cabinet color, coordinated hardware, and quieter counters created a cleaner visual line from one area to the next.

Key Details That Made the Biggest Difference
Some renovation choices create more impact than others. In this project, the biggest gains came from decisions that improved both form and function.
The Wall Removal Changed the Entire Experience
Opening the wall did not add square footage, but it made the home feel larger. Sightlines improved, natural light spread farther, and the person cooking no longer felt cut off from the rest of the room.
When planning a similar change, confirm the structural requirements early. A beam can be a clean solution, but it must be sized and installed correctly.
The Island Created a Useful Center
The island added prep space, storage, and seating in one move. It also helped define the kitchen without rebuilding barriers.
Clearance matters. Many kitchens need comfortable walking space around all sides of the island, especially near appliances. Tight clearances can make even a beautiful island frustrating.
The Lighting Plan Solved Daily Problems
One ceiling light rarely does enough in a kitchen. This renovation used layers.
General lighting brightened the room. Pendant lights marked the island. Under-cabinet lights improved task areas. Together, they made the kitchen more flexible for cooking, cleaning, reading, and evening use.
The Finishes Made the Room Feel Cohesive
The old room had too many disconnected surfaces. The new design reduced visual noise.
A limited palette does not have to be boring. Subtle veining in counters, tile texture, cabinet hardware, and warm wood flooring all add interest without overwhelming the room.
Tips for Homeowners Planning a Similar Renovation
A successful renovation starts long before the first cabinet comes out. Use these tips to avoid common problems.
Decide What Is Not Working Now
Make a list of frustrations before thinking about finishes. Poor storage, bad lighting, awkward traffic, and lack of prep space should guide the design.
Pretty materials cannot fix a bad layout.
Set a Realistic Construction Budget
Renovations often reveal hidden conditions. Build a contingency into the budget for items such as electrical updates, subfloor repairs, plumbing reroutes, or structural changes.
The exact amount will vary by project, region, and home age, but leaving no room for surprises creates stress.
Choose Materials for Real Life
Think about how the space will be used.
Homes with pets, children, or heavy kitchen use may need more durable flooring and easy-clean surfaces. A lower-maintenance counter may be a better choice than a delicate natural stone if the kitchen sees daily cooking.
Order Key Materials Early
Cabinets, specialty tile, appliances, and custom fixtures can affect the schedule. Waiting too long to choose them can stop progress.
Make selections before demolition when possible. That gives the contractor better information and reduces last-minute compromises.
Keep a Project Record
Save drawings, permits, product names, paint colors, appliance manuals, and warranty information. Store before photos with finished photos.
This record helps with future repairs, resale conversations, and later design updates.
Plan for Life During Construction
A kitchen renovation disrupts routines. Set up a temporary food prep area with a microwave, coffee maker, small fridge, and basic dishes. Protect nearby rooms from dust. Talk through work hours, parking, access, and cleanup expectations before construction starts.
Good planning makes the messy middle easier to handle.
The Best Transformations Solve Problems First
A dramatic before-and-after photo is satisfying, but the real success of a renovation shows up in daily life. The room is easier to cook in. Storage makes sense. Light reaches the places where tasks happen. People can gather without blocking the work zone.
The strongest projects begin with honest observation. What feels cramped? What gets in the way? Which materials are failing? Which features are worth keeping?
From there, each construction step should support the same goal: turning an underperforming space into one that feels natural, durable, and well-designed. When the layout, materials, lighting, and craftsmanship work together, the transformation lasts long after the final photo is taken.


Comments